Sometimes you have to face ERR_TUNNEL_CONNECTION FAILED error on your computer screen while you are connecting VPN to your computer or surfing on the internet. There are a lot of reasons behind it and some of them are-
- Incorrect website domain configuration.
- Conflicting browser data.
- DNS Connection Issues.
- Proxy settings incorrectly entered.
But, you do not have to worry at all because we have listed a few of the ways by which you can easily get rid of the issue. Some of these ways are as follows-
Fix 1: Set up Automatically Detect the Connection Settings
Step 1: Type Internet Options in the Search box to open it. Then navigate to the Connections tab.
Step 2: Under the Local Area Network (LAN) settings section, click the LAN settings button.
Step 3: Then uncheck the Use a proxy server for your LAN (These settings will not apply to dial-up or VPN connections) box.
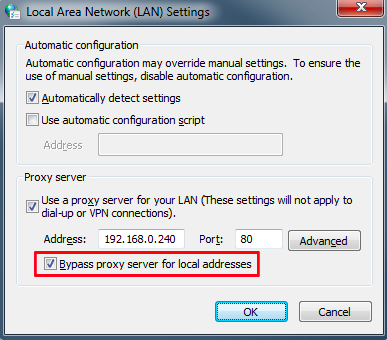
Step 4: Click OK and then reboot the computer to make the changes.
Fix 2: Flush the DNS Resolver Cache
Now, you can even flush the DNS resolver cache to get rid of the issue. To do this, follow the steps given below-
Use Run
Press Windows key and R at the same time to invoke Run window.
Then, Input ipconfig /flushdns in the empty box and click OK.
After that, a command box will appear on the screen and the DNS cache will be cleared.
Use PowerShell
Step 1: Right-click Start button the open the menu.
Step 2: Choose Windows PowerShell (Admin) to run PowerShell as administrator.
Step 3: Type the command clear-dnsclientcache and press Enter.
Use Command Prompt
Type ipconfig /flushdns and press Enter key. Other commands are-
- ipconfig /displaydns: To see your current DNS cache under Windows IP configuration.
- ipconfig /registerdns: To register your DNS cache recorded in Hosts file.
- ipconfig /release: To release the current IP address settings.
- ipconfig /renew: To reset and request new IP address.
To turn off DNS cache, type command net stop dnscache and press Enter
To turn on DNS cache, type command net start dnscache and press Enter.
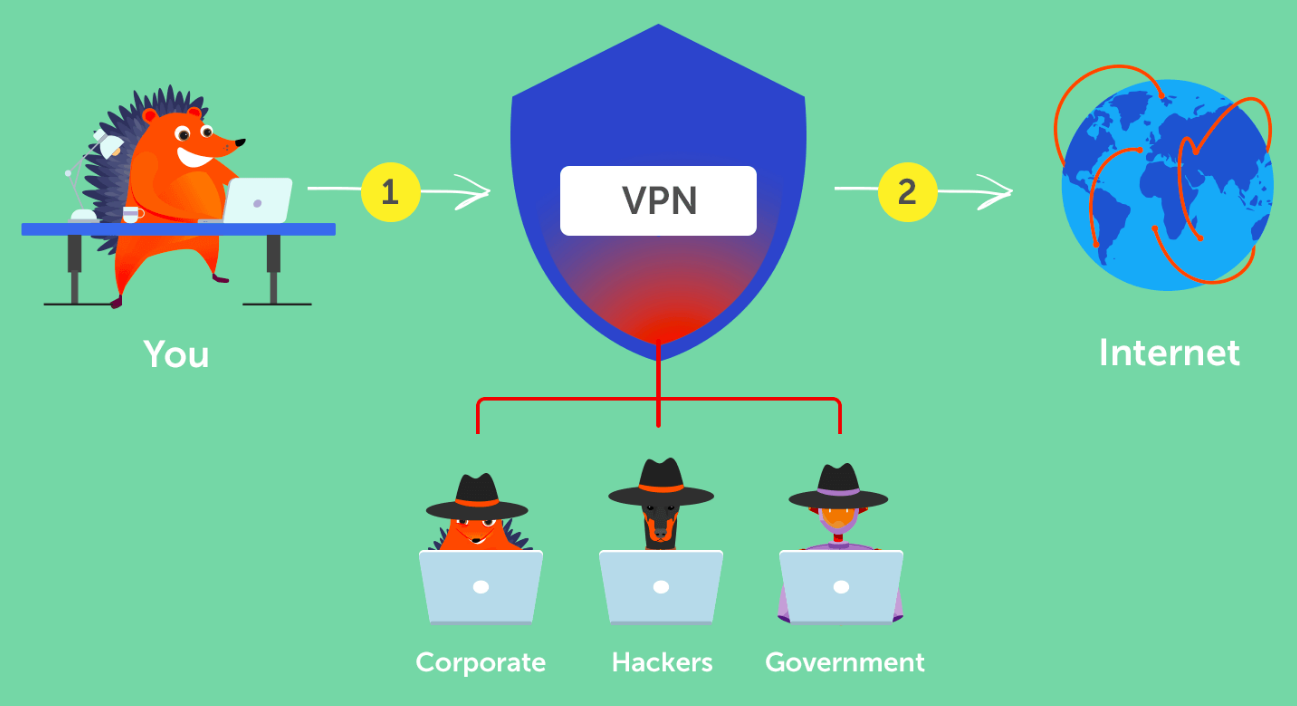
Fix 3: Use a VPN Connection
You can try these VPN connection extensions from the Google Chrome extensions online store and check if you can access those sites normally or are you facing any issue dealing with them.
Fix 4: Clear Browser Data
Step 1: In the Chrome page, press Ctrl + Shift + Delete keys at the same time to open the Clear browsing data window.
Step 2: Go to the Advanced tab and select All time from the drop-down menu.
Step 3: Select the Browsing history, Download history, Cookies and other site data, and Cached images and files checkboxes.
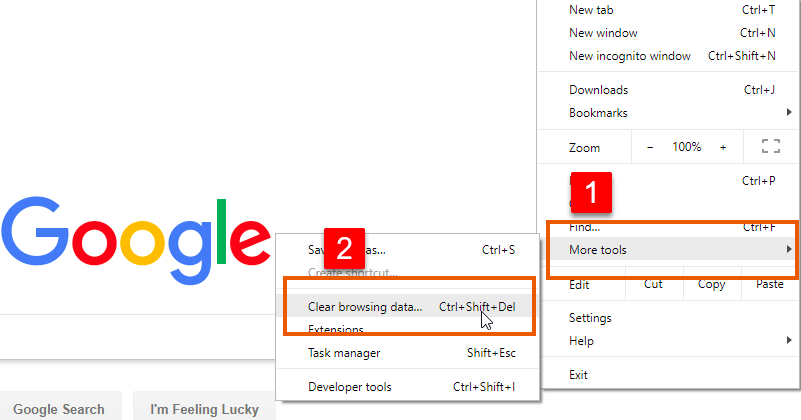
Step 4: Click the Clear data button to apply this change.
Fix 5: Remove Conflicting Browser Extensions
The extensions in the browser can also cause this issue. So, for this, you need to either remove or disable the extensions from the browser to get rid of the issue.
Fix 6: Reset Google Chrome Browser
Step 1: Open Google Chrome, and then click the Customize and control Google Chrome button.
Step 2: Click Settings on the upper right corner of the main page to open the snapshot.
Step 3: Expand the Settings tab and click Advanced to open the drop-down menu.
Step 4: Navigate to the System tab on the drop-down menu, and turn off the Use hardware acceleration when available setting.
Fix 7: Disable proxy setting
- Press Windows Key + R from the keyboard, and it’ll open RUN
- Type, cpl in RUN and press Enter or click OK button.
- Once Internet Propertiesopens, click on Connections Tab
- Select and Click the option LAN Settings.
- Once you click LAN settings, a separate window will open, and there you’ll require to unselect the option “Use a proxy server for your LAN.” And ensure that the “Automatically detect settings“ option is selected. Now, click the OK button to apply the settings.
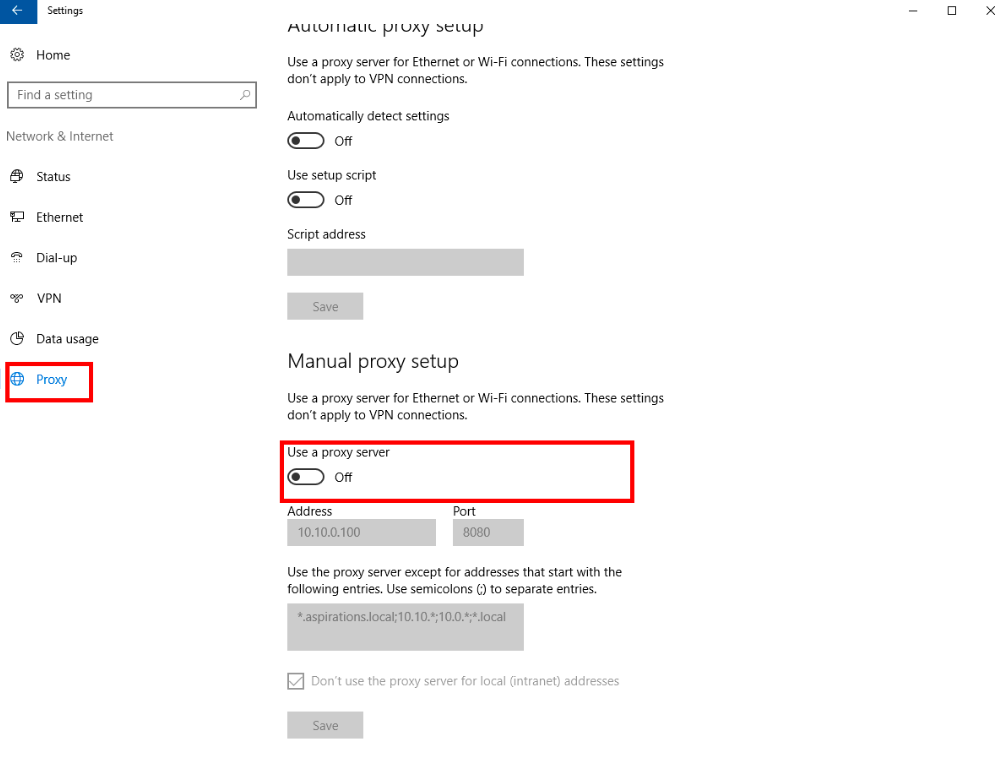
- Close all the windows and restart your computer and open Google Chrome to see if the issue is resolved or not.
Fix 8: Change DNS Address
- Select the Network icon from the Taskbar
- It allows you to connect with the WiFi network through your PC. Now, right-click on that Network icon, and from that, select the Open Network and Sharing Center option and open the Network and Sharing Center window.
- Go to the option, View your active networks Now, click on the network you’re currently connected with.
- Click on the Properties
- Select the Networking tab and find the Internet Protocol Version 4 (TCP/IPv4)option from that provided list and double click on it.
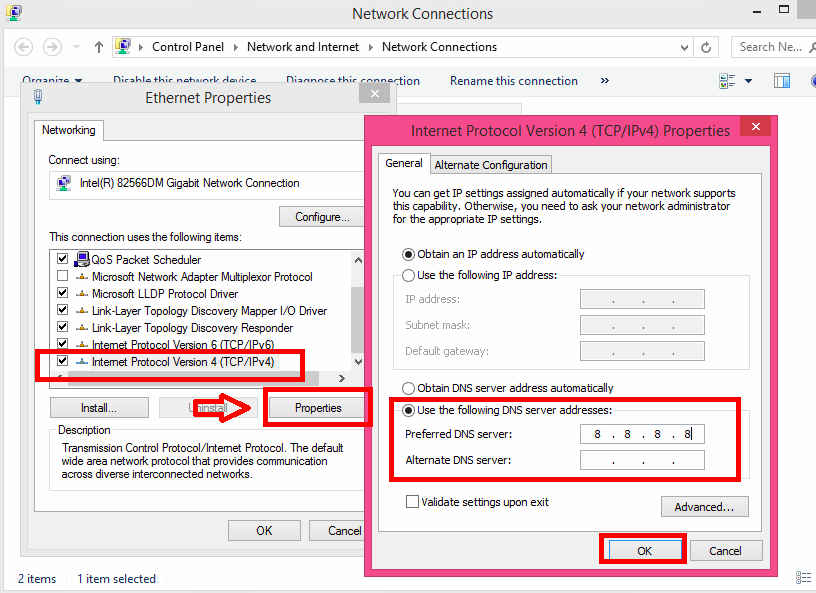
- Once you set the DNS address, select and check the Validate settings upon exit option. When it’s done, click on the OK button and apply DNS settings.
Conclusion
Thus, you see these are some of the steps by which you can get rid of the error and open various websites on your chrome without any issue or interruption. But make sure to save your important files and documents beforehand so that you do not have to lose them in a manner. Also, you do not have to perform all the steps simultaneously but if the issue is getting resolved by performing only one step, then you need not do the others.
